Homepage
This guide explains how to set up your homepage using the Folio theme in Ghost.
1. Profile with name and profession
Section titled “1. Profile with name and profession”- Go to Ghost Admin → Settings → Design & Branding → Theme.
- Upload your Profile Image and Second Profile Image.
- And add your Full Name and Professional title
2. Adding Social Media Links
Section titled “2. Adding Social Media Links”- Go to Ghost Admin → Settings → Social accounts.
- Add your links:
- Facebook: Paste full profile URL (e.g.,
https://facebook.com/yourpage) - X (Twitter): Enter handle or full profile URL (e.g.,
https://twitter.com/yourhandle)
- Facebook: Paste full profile URL (e.g.,
Other Social Networks
Section titled “Other Social Networks”- Navigate to Settings → Design & Branding → Theme.
- Add your Instagram and Pinterest and the other profile links.
3. Hero section:
Section titled “3. Hero section:”- For H1 text, Go to Settings → Design & Branding → Theme → Bio headline.
- For Description bellow the title text, Go to Settings → Design & Branding → Theme → Bio Description.
- For Button Get In Touch , Go to Settings → Design & Branding → Theme → Contact Email. For the text it can be edited via Translation file.
4 and 5. Location and timezone:
Section titled “4 and 5. Location and timezone:”- Go to Ghost Admin → Settings → Design & Branding → Theme.
- Add your location in “Location Field and Timezone in “Timezone Field”.
- In Available for work selection Choose your current situation, If your are open to work then the theme display Open to new opportunities, if not Welcome to my portfolio is displayed instead. you change both of the text via translation file.
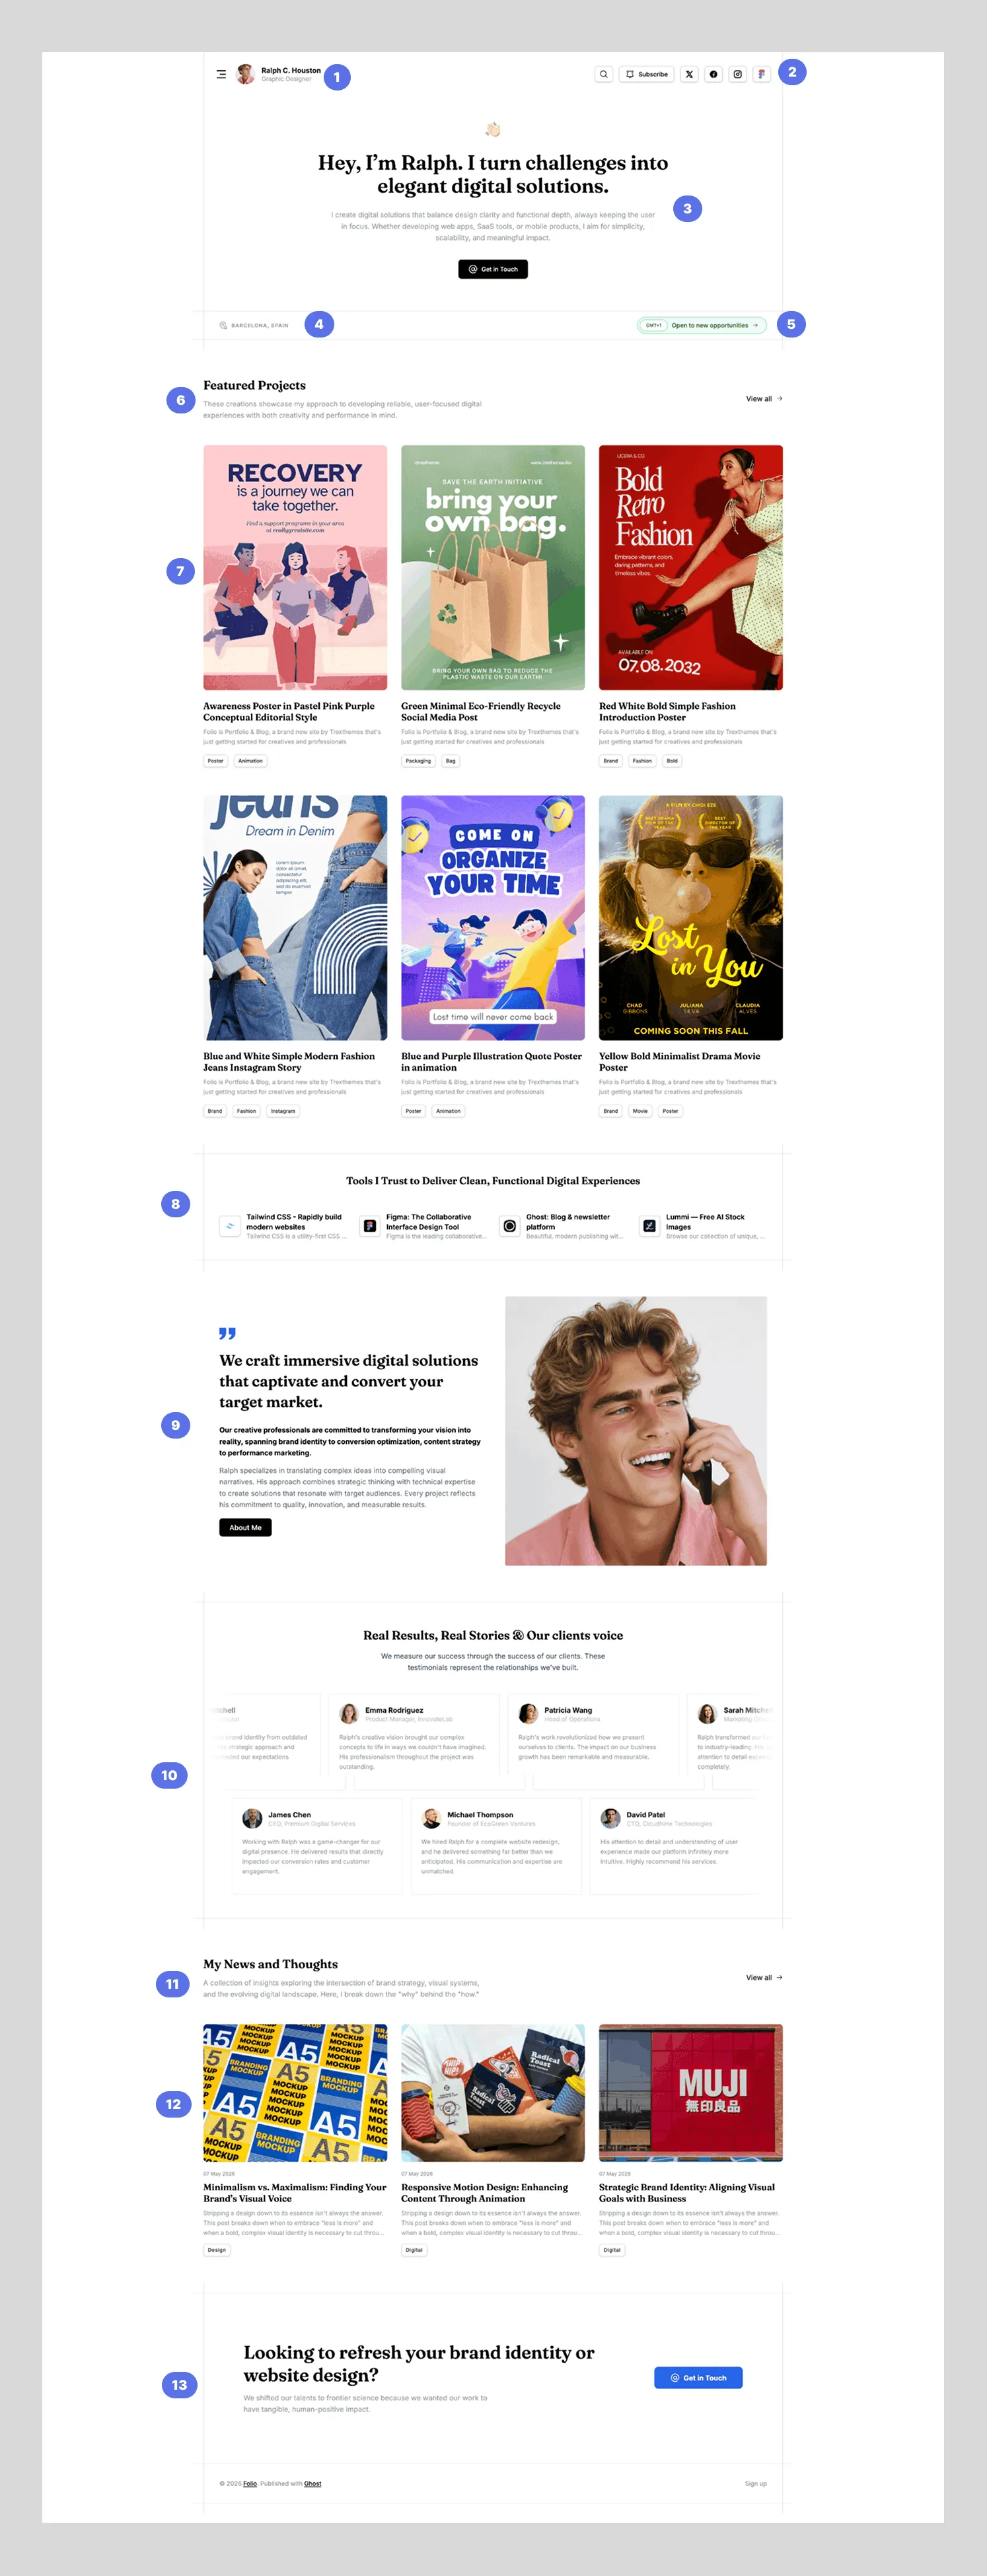
6 and 7. Featured Projects:
Section titled “6 and 7. Featured Projects:”By default, this section displays 6 Featured Projects. Follow the steps below to configure and customize this section.
1. Set Up the Section Header
Section titled “1. Set Up the Section Header”Create a new Page to serve as the “anchor” for this section:
- Slug: Set the slug to
projects. - Title: The title you enter here will be the section’s main headline.
- Excerpt: The text provided in the excerpt field will serve as the section’s description.
2. Create and Tag Your Projects
Section titled “2. Create and Tag Your Projects”Each project is created as an individual Post. To ensure they appear in the portfolio:
- Internal Tag: Add the internal tag
#projectin the post settings (the#ensures it is hidden from your public tag list). - Template Selection: In the right-hand settings panel, change the Template dropdown to
Portfolio.
3. Adjust the Number of Displayed Projects
Section titled “3. Adjust the Number of Displayed Projects”If you wish to show more or fewer than the default 6 projects:
- Go to Ghost Admin → Settings → Design & Branding.
- Click on Customize and select the Theme tab.
- Locate the field labeled “Number of projects in homepage”.
- Enter your desired number and click Save.
8. Adding Recommendations:
Section titled “8. Adding Recommendations:”The Recommendations feature allows you to cross-promote other publications and build a network with fellow creators.
To begin recommending other sites to your audience:
- Access Settings: Navigate to Settings → Growth → Recommendations in your Ghost dashboard.
- Add Site: Click Add recommendation and enter the URL of the publication you wish to suggest.
- Personalize: You can customize the Title and Description for each specific recommendation to explain why you like it.
- The main heading for the recommendations section can be edited and localized through your theme’s translation files.
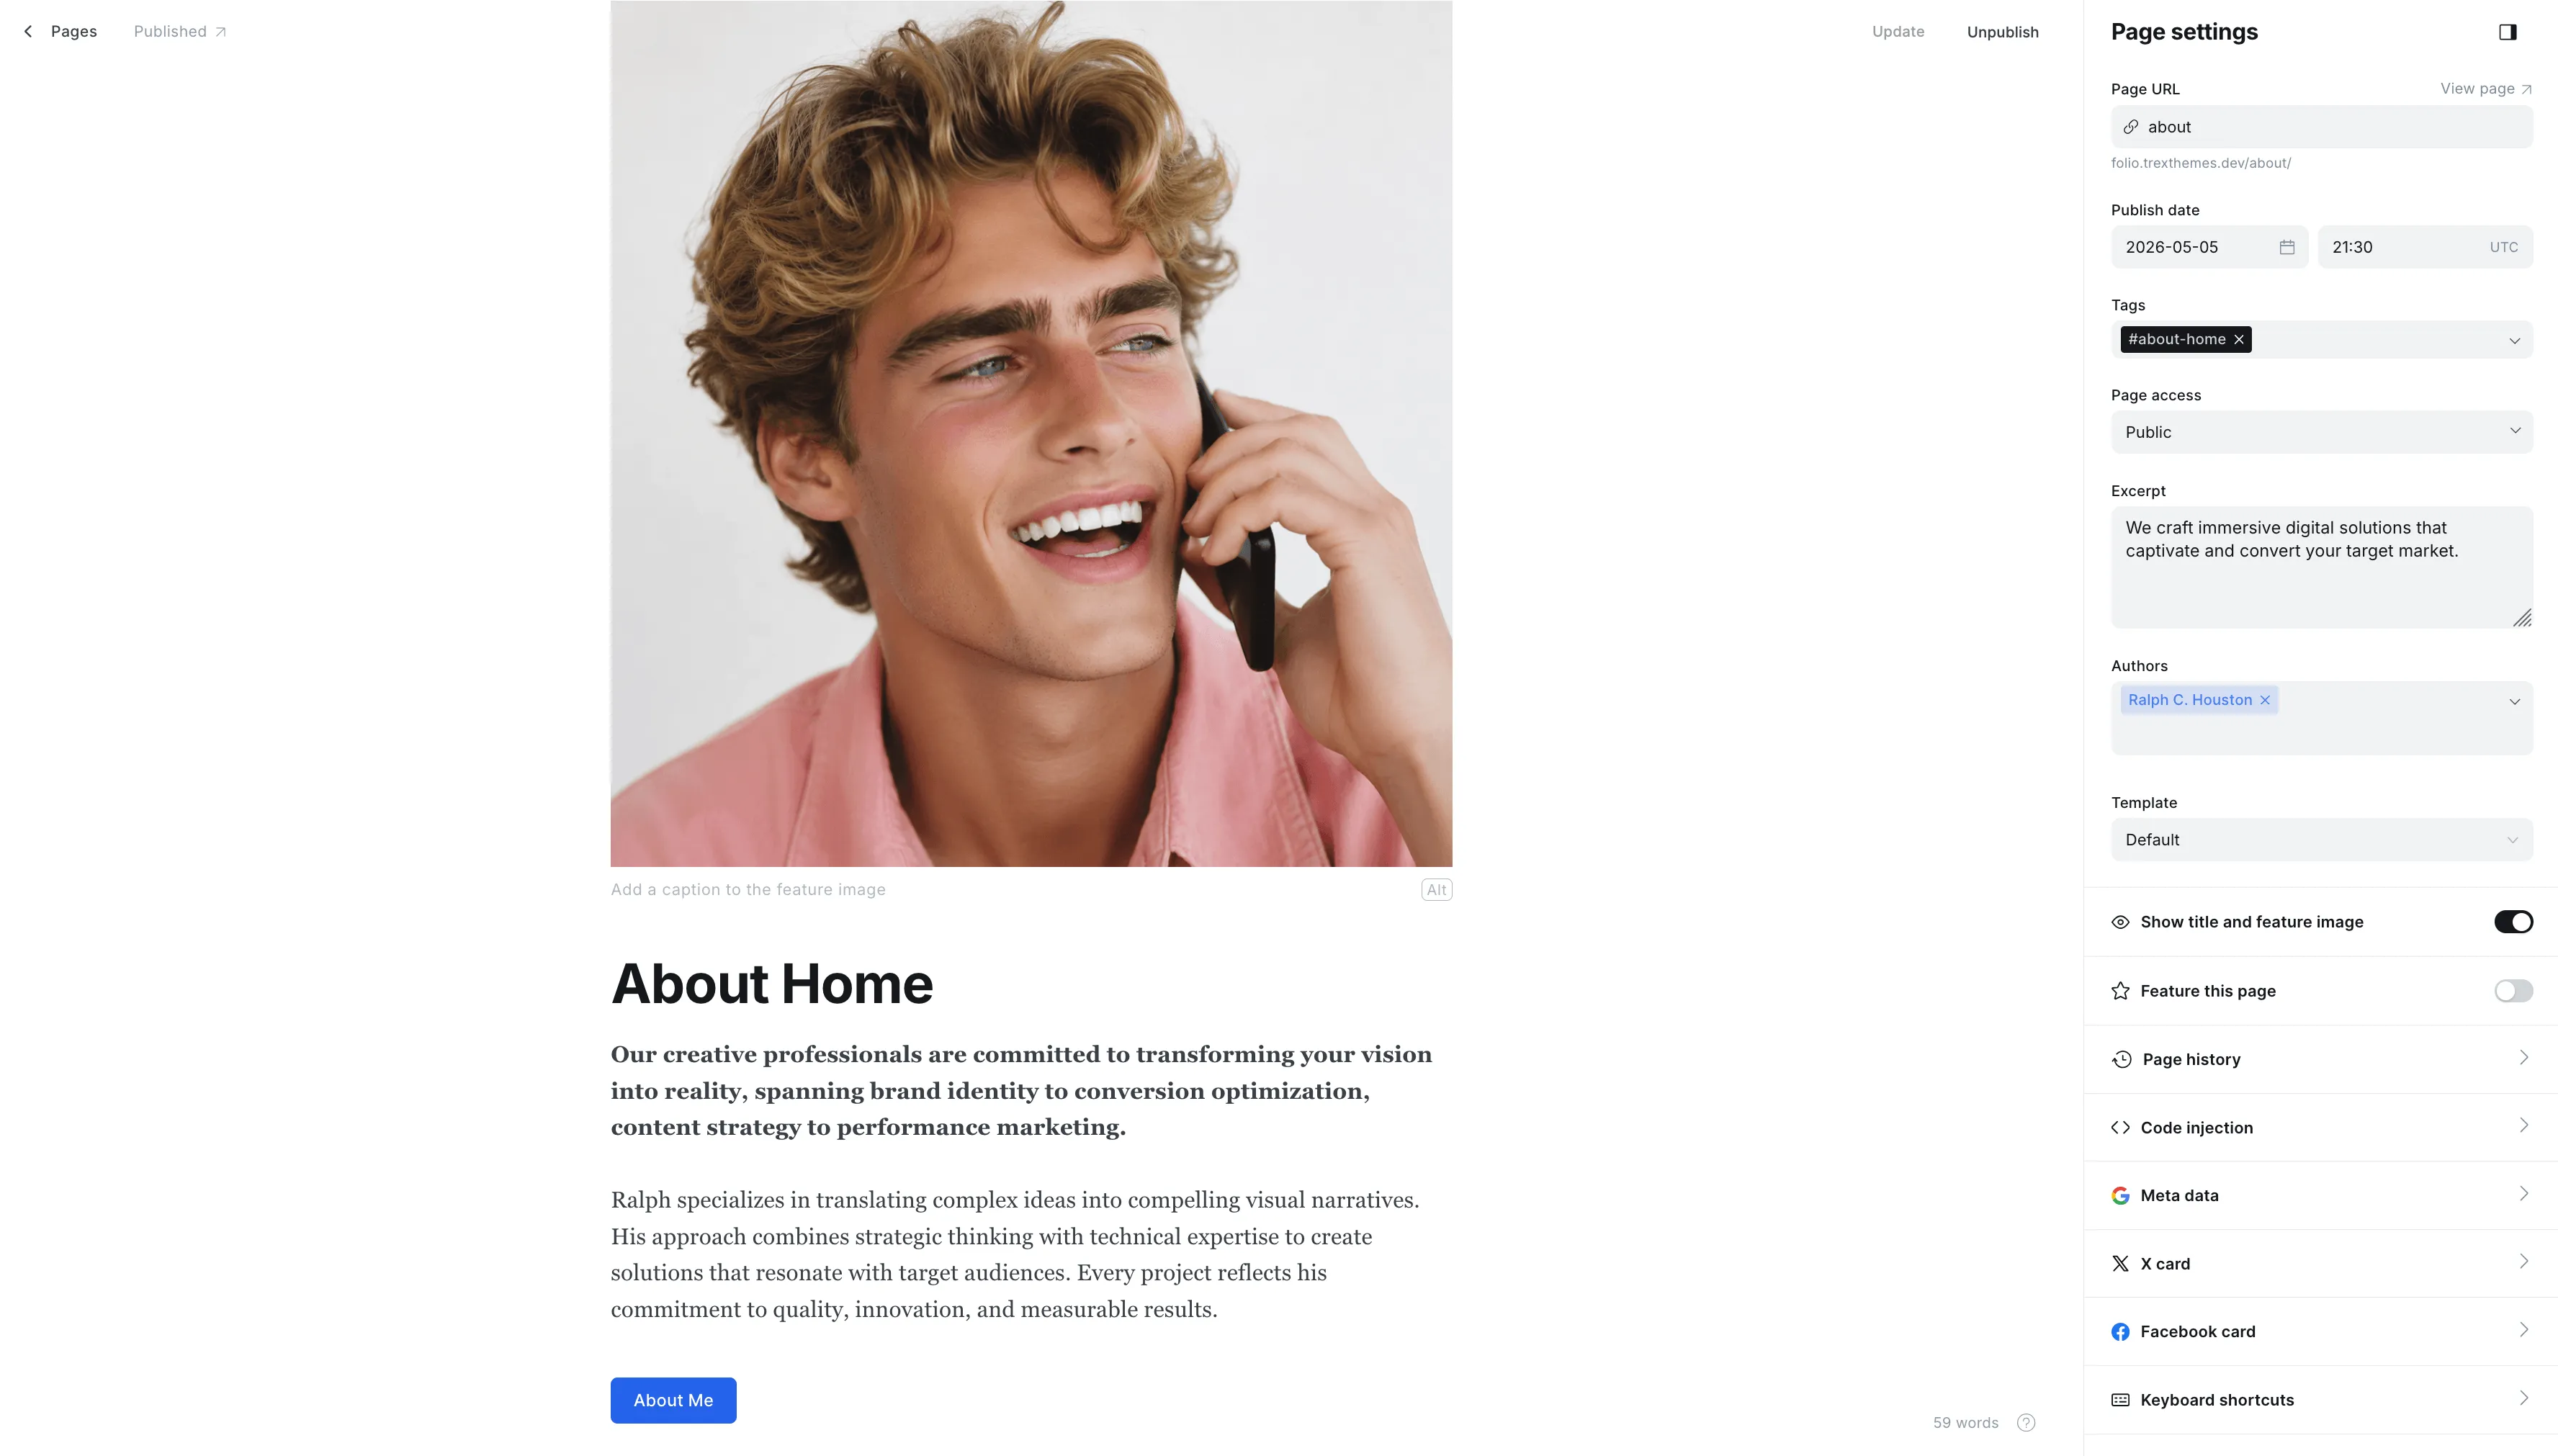
9. Bio Section:
Section titled “9. Bio Section:”To set up the “About” section on your homepage, create a new Page and configure it with the following details:
- Internal Tag: Add the internal tag
#about-homein the page settings panel to identify it as the source for this section. - Headline/Quote: The text you enter into the Excerpt field will serve as the section’s main title or quote.
- Section Image: The Featured Image assigned to the page will be displayed as the primary visual for this section.
- Main Content: All text written in the Body of the page will appear as the descriptive content for the section.
10. Testominals Section:
Section titled “10. Testominals Section:”To set up the Testimonials section on your homepage, follow these steps to create the main container and individual reviews:
1. Initialize the Section
Section titled “1. Initialize the Section”Create a new Page with the following settings:
- Internal Tag: Add the tag
#testimonialsin the page settings panel. - Headline: The Title of the page will serve as the section’s main headline.
- Description: The text provided in the Excerpt field will be used as the section description.
2. Add Individual Reviews
Section titled “2. Add Individual Reviews”To add reviews, use the Product Card feature within the body of this page. For each card, map the information as follows:
- Reviewer Image: Upload the person’s photo into the Product Image slot.
- Reviewer Name & Profession: In the Product Name field, use the format
Name*Profession(e.g., John DoeSoftware Engineer*). - Comment: Enter the reviewer’s feedback into the Product Description field.
11 and 12 Blog Section:
Section titled “11 and 12 Blog Section:”1. Set Up the Section Header
Section titled “1. Set Up the Section Header”Create a new Page to serve as the “anchor” for this section:
- Slug: Set the slug to
blog. - Title: The title you enter here will be the section’s main headline.
- Excerpt: The text provided in the excerpt field will serve as the section’s description.
2. Create Blog Posts
Section titled “2. Create Blog Posts”Create a normal individual Post.
13. Footer
Section titled “13. Footer”1. Update Copyright Information
Section titled “1. Update Copyright Information”To modify the text appearing in the footer:
- Navigation: Go to Settings → Design & Branding.
- Field: Click on Customize, open the Theme section, and locate the Footer text field.
- Save: Enter your desired copyright notice and save your changes.
2. Configure the “Get In Touch” Button
Section titled “2. Configure the “Get In Touch” Button”The contact button on your site is linked to your email address:
- Email Destination: Go to Settings → Design & Branding → Theme and update the Contact Email field.
- Button Text: To change the “Get In Touch” label, you must edit the value within your theme’s Translation (locales) file.
3. Localization & Other Text
Section titled “3. Localization & Other Text”- General Text: Most other labels in footer are managed via the translation files
14. Other Setting
Section titled “14. Other Setting”Primary Color:
Section titled “Primary Color:”- Go to Ghost Admin → Settings → Design & Branding → Brand.
- Find the “Accent Color” field and choose your color
- For dark mode color:
- Go to Settings → Design & Branding → Theme.
- Find the “Accent Color for Dark mode” field and choose your color
Navigation
Section titled “Navigation”The Folio theme provides flexible navigation options.
📌 Primary Navigation
Section titled “📌 Primary Navigation”(Displayed at the top of your site)
- Go to Ghost Admin → Settings → Navigation.
- Click Customize next to Primary Navigation.
- Add/Edit Menu Items:
- Drag to reorder links.
- Click + to add new items.
- Click the trash icon to remove items.
- Click Save to apply changes.
➕ Secondary Navigation
Section titled “➕ Secondary Navigation”(Optional menu for extra links or CTAs)
- In the same Navigation settings, click Customize next to Secondary Navigation.
- Build your menu following the same steps as above.